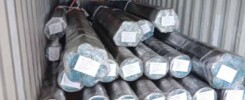
Hydraulic cylinders require high-precision machining to ensure smooth operation, durability, and leakage resistance. Honing is a critical finishing process that enhances the surface quality and dimensional accuracy of cylinder bores. Below is the typical production process for honing hydraulic cylinders:
1. Material Preparation
- Material Selection: High-strength materials such as alloy steel, stainless steel, or carbon steel CK45,ST52 are selected based on application requirements (e.g., pressure rating, corrosion resistance).
- Machining: The cylinder block is initially machined using turning, milling, or drilling to create a rough bore.
2. Pre-Honing Preparation
- Cleaning: The bore is thoroughly cleaned to remove chips, oils, or contaminants.
- Deburring: Any sharp edges or burrs are removed to ensure smooth honing.
- Fixturing: The cylinder is securely clamped in a honing machine to prevent movement during processing.
3. Honing Process
- Tool Setup: A honing tool (multi-stone abrasive head) is mounted on the machine. The stones are typically made of diamond or silicon carbide for high efficiency.
- Lubrication: Coolant (e.g., oil-based emulsion) is applied to reduce heat and prevent stone loading.
- Honing Motion:
- The tool rotates while oscillating axially (reciprocating motion).
- Cross-hatch patterns are created on the bore surface for optimal oil retention and wear resistance.
- Parameters:
- Speed: 20–100 m/min (rotational speed).
- Stroke Length: Depends on cylinder length (typically 50–200 mm).
- Pressure: Controlled feed force (5–50 N) to avoid over-finishing.
4. Honing Stages
- Rough Honing: Removes material quickly to achieve near-final dimensions (e.g., stock removal of 0.1–0.5 mm).
- Fine Honing: Refines surface finish to Ra 0.4–1.6 μm using finer abrasives.
- Final Honing (Micro-Honing): Achieves ultra-smooth surfaces (Ra < 0.4 μm) for high-performance applications.
5. Post-Honing Processing
- Cleaning: The bore is cleaned with solvents or ultrasonic cleaning to remove residual honing oil and debris.
- Deburring: Final deburring of entry/exit edges to prevent stress concentrations.
- Surface Treatment (Optional):
- Chrome Plating: For enhanced wear resistance.
- Nitriding: To improve surface hardness.
- Coating: DLC (Diamond-Like Carbon) or Teflon for reduced friction.
6. Quality Inspection
- Dimensional Checks: Bore diameter, roundness, and straightness measured with bore gauges or CMM.
- Surface Roughness: Tested using profilometers or laser scanning.
- Cross-Hatch Angle Verification: Ensures uniform oil retention patterns (typically 30–60°).
- Functional Testing: Leakage and pressure tests to validate performance.
Key Advantages of Honing
- Precision: Achieves tight tolerances (e.g., ±0.005 mm).
- Surface Integrity: Creates a uniform cross-hatch pattern for optimal lubrication.
- Cost-Effective: Removes minimal material while correcting machining errors from prior operations.

